Accounts serve as a primary way Tracker organizes your data. These accounts, effectively, serve as your customers and vendors. They determine how Tracker view's your invoice requested by and bill to settings.
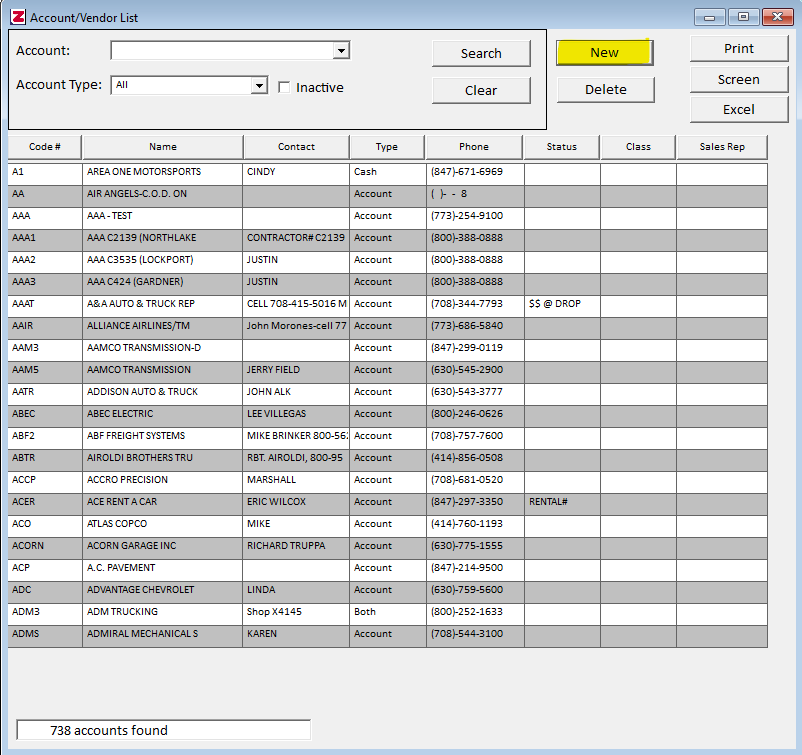
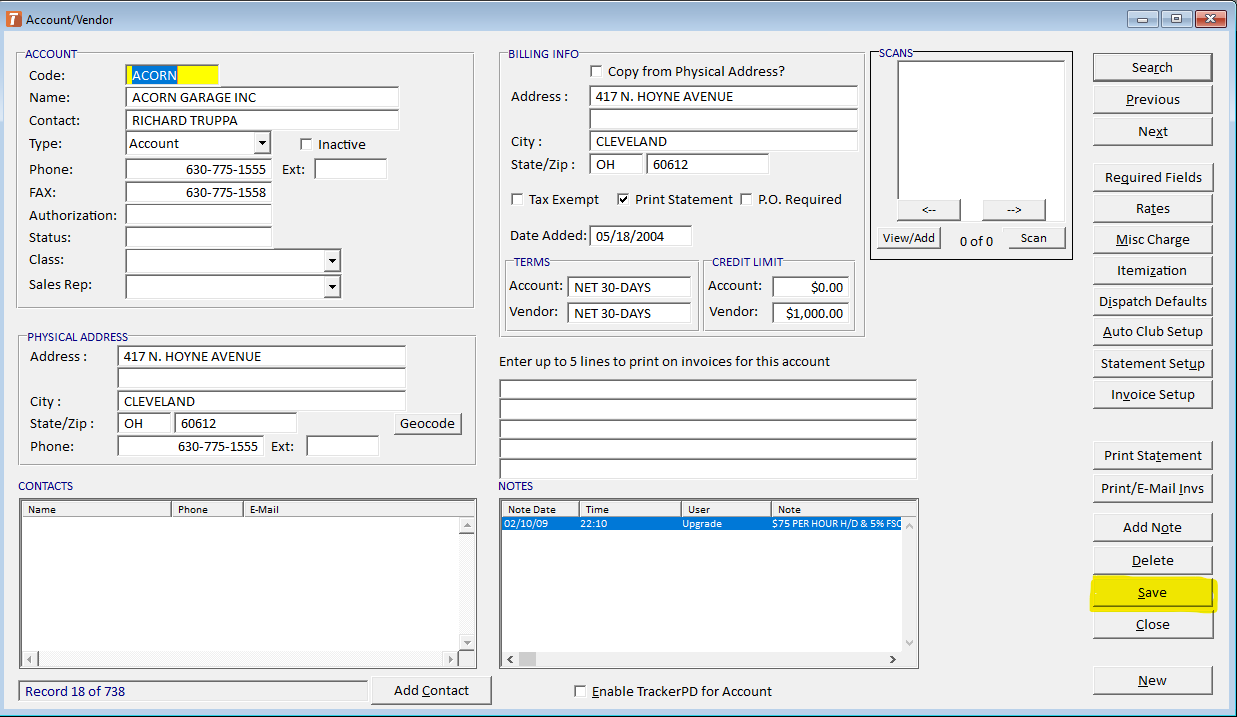
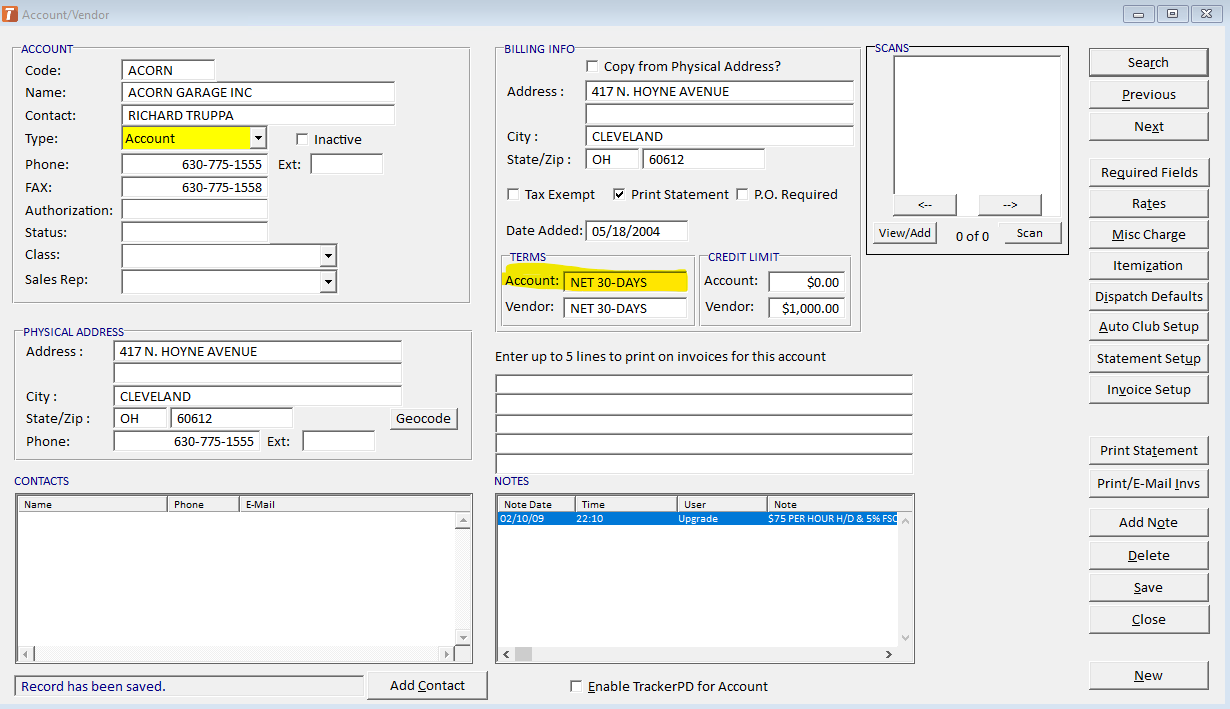
You can start adding a new account into Tracker by navigating to Lists -> Account -> Account Vendor (seen below on the left). From the Account/Vendor list, click on the New button. This will bring up a blank slate Account/Vendor window for you to fill out (seen below on the right). Once you have your account configured to your liking, remember to click on the save button in the bottom right of the Account/Vendor window.
The Quick Setup
This section will only cover the required fields in order for you to get your accounts setup and going as soon as possible. The following sections will go into more detail on how else you can customize your account's information.
Account Section - Required
The only fields that are required for you to fill out are the Name, and the Code, and then choose an account type. We suggest filling out the Name field first, and then assign a short code for that name. The short code functions as a shorthand for data entry and helps differentiate between different accounts with the same or similar names. After entering in the name and code, determine what type of account this is.

Terms - Required
The Terms area is a subcategory of the Billing Info section, and it just determines how Tracker represents certain information under the Aging Detail report, and Statements. Be aware that you will be required to fill out the account term, the vendor term, or both depending on which account type you are using. (In the example below, both Account and Vendor Terms are filled out, but only Account is required because Account is the Type I chose in the previous step).
You can edit and add new Terms by navigating to Lists -> Accounts -> Terms.
Rates - Suggested for Certain Accounts
Rates are how Tracker determines what is automatically charged for a specific accounts storage, towing, how mileage is calculated, and if there are any default discount percentiles. For more information, see our Rates Guide.
Dispatch Defaults - Suggested
It is very common to have certain accounts requiring specific settings to be in place for each of their individual tows. As such, you may have a police account that will require towed vehicles to be impounded at a certain lot, or perhaps an account will have a fairly consistent ETA. These types of dispatch settings can be configured from the Account/Vendor window, and then select Dispatch Defaults on the right-hand side.

Once you are in your account's Dispatch Defaults, you can turn any data entry field into a default setting for every call for this account. Just be sure to check the box in the top left of the screen in order to actually use any of the settings.
Additional Setup
Below will be a list of the optional sections within the account setup, along with a few tips, so you can better understand what you can do with your accounts. It is advised that you skip down to the section you would like to know more about.
Physical Address
This section is used under the circumstance that you will need to physically mail documents to an address.
Contacts
You may need to contact certain individuals from an account in order to follow up on a specific tow. Tracker can keep tabs on these people by adding them into the account's contact list.
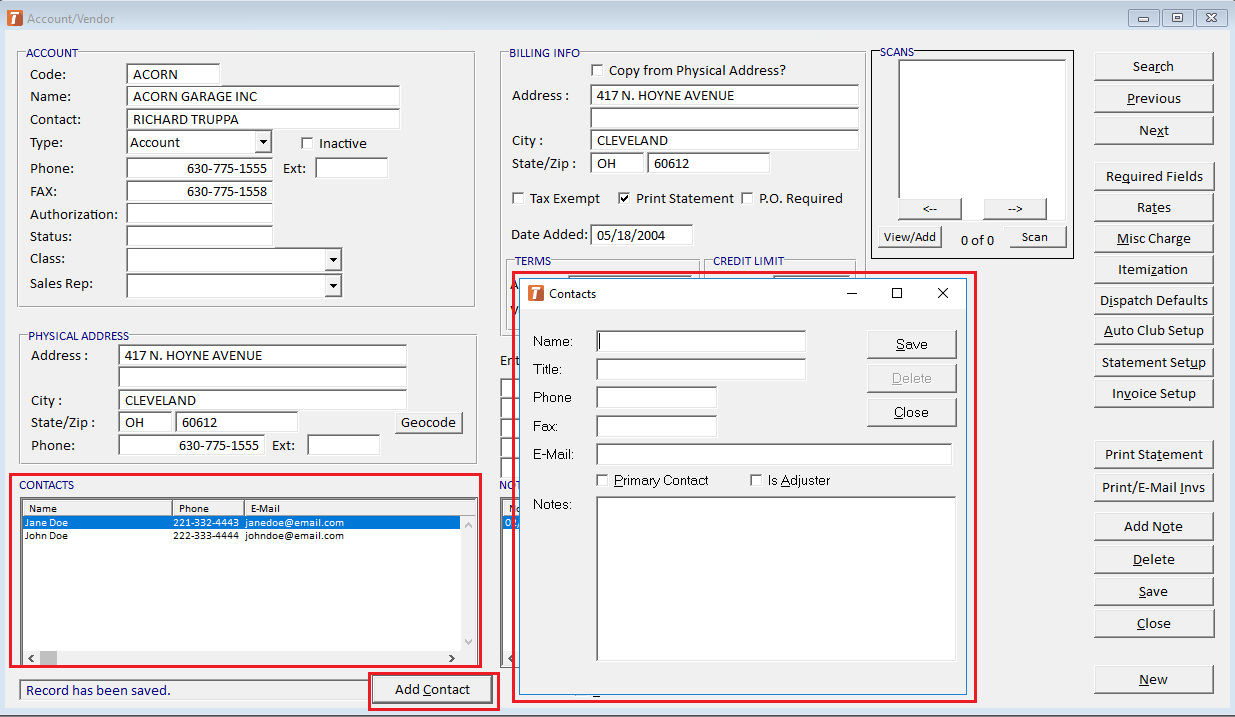
This section is pretty self-evident, but there's one aspect to it you may not know. If you enter the word Statement into the title field, this contact will be used when emailing statements for this account.
Billing Info
There are some accounts where their billing address is different from their physical address. This section is for keeping track of their billing address.

In addition, this is also the section where you will make an account Tax Exempt, permit the account to Print Statements, and require a Purchase Order Number, or P.O. number when running an invoice for the account.
Required Fields
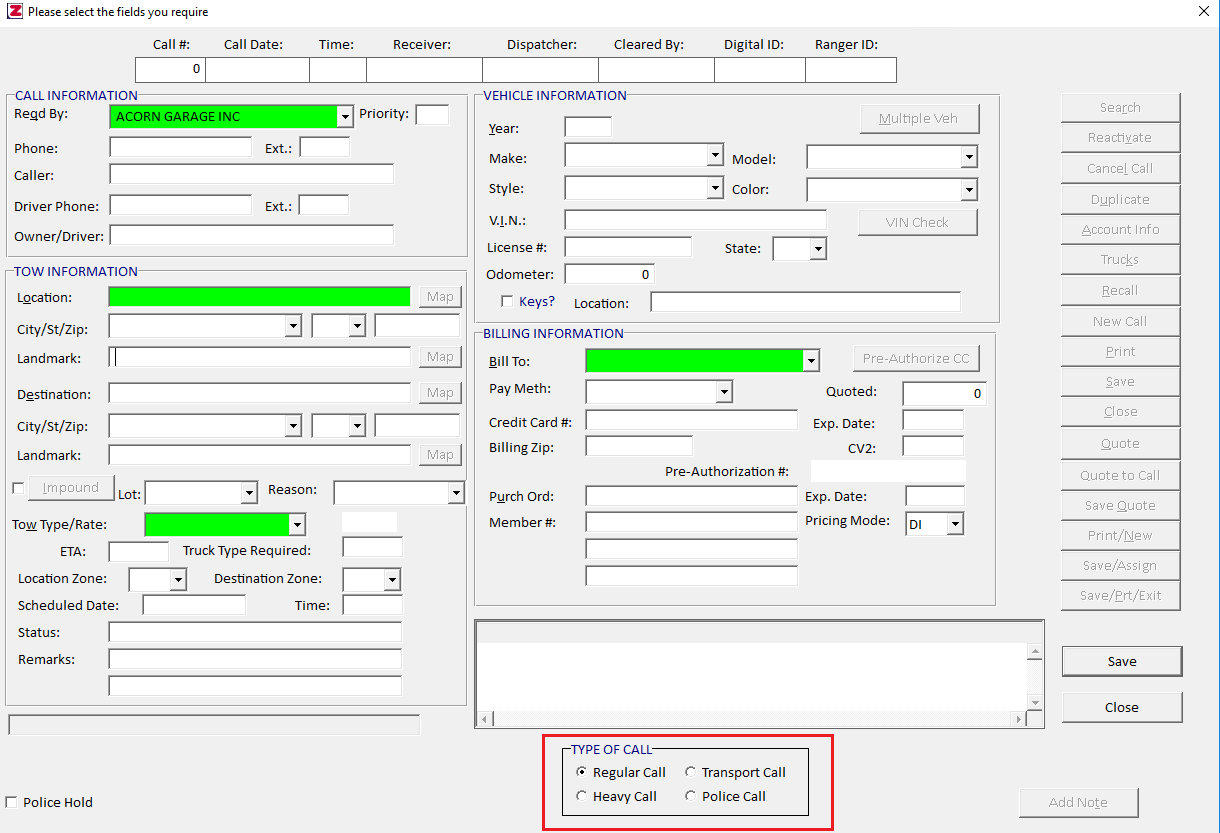
On the right-hand side of the Account/Vendor window is a button called Required Fields. This option will open a call intake window with various green highlighted fields. By default, you are taken into the required fields for a Regular Call type. Simply click in the box that you would like to require for that call type and it will be highlighted green. This means that this field will require information to be entered into it when creating a new call for that call type. Tracker supports four call types: Regular Call, Heavy Call, Transport Call, and Police Call. Each of these calls has different information associated with them.

Simply choose the call type you would like to alter from the Type of Call section, as seen below. This will open up another window where you can pick which fields you would like to be required for the call intake on this account.
Itemization
Tracker allows you to itemize your invoices, or put in another way, it allows you to add on additional charges to your invoices. This way you can make a default itemized item for an account, which will save some time at the call screen. You can get to this menu by clicking on the Itemization button on the right-hand side of the Account/Vendor screen. Then you can add a new item by clicking on the New button. This window that appears requires a short code and a charge type to be inputted. Make sure to click Save when finished.

Statement, and Invoice Setup
These two sections dictate what is printed on this account's invoices, and statements respectively. Simply click on either the Statement Setup button, or Invoice Setup button, choose to use the per account settings at the top of the window, and check which fields you would like to appear on a finished print job.
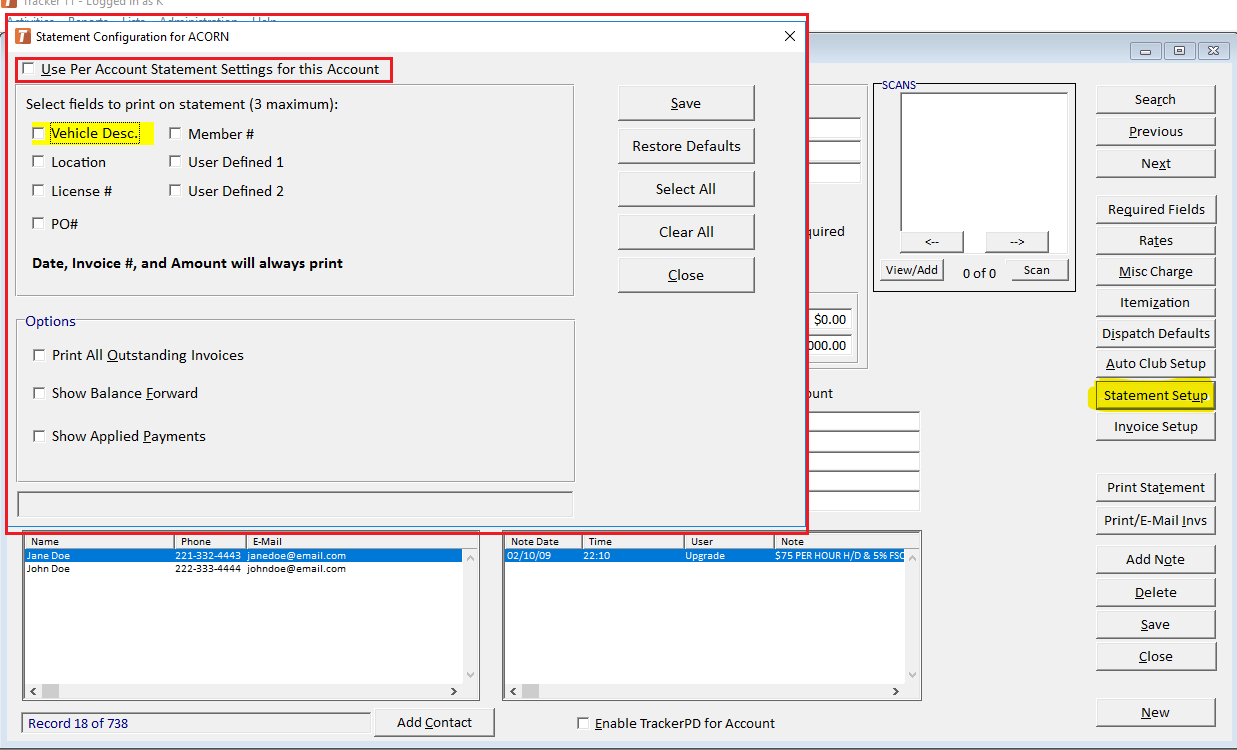

Be aware that there is a global setting for these two by navigating to Administration -> Defaults Setup -> Invoice Setup/ Statement Setup. This global setting will be considered the default for all accounts, unless you specifically use the per account setting as seen above.