It is very possible that certain circumstances will prevent you from servicing particular accounts. In these cases we advise that you simply switch these accounts to an Inactive state within Tracker. This will allow you to easily reinstate the account at a later date if you need to.
To make an account inactive, from the main Tracker menu, navigate to Lists -> Account -> Account Vendor. This will bring up the Account list. Search for the account you are after and double click on it to open up the Account/Vendor Profile.
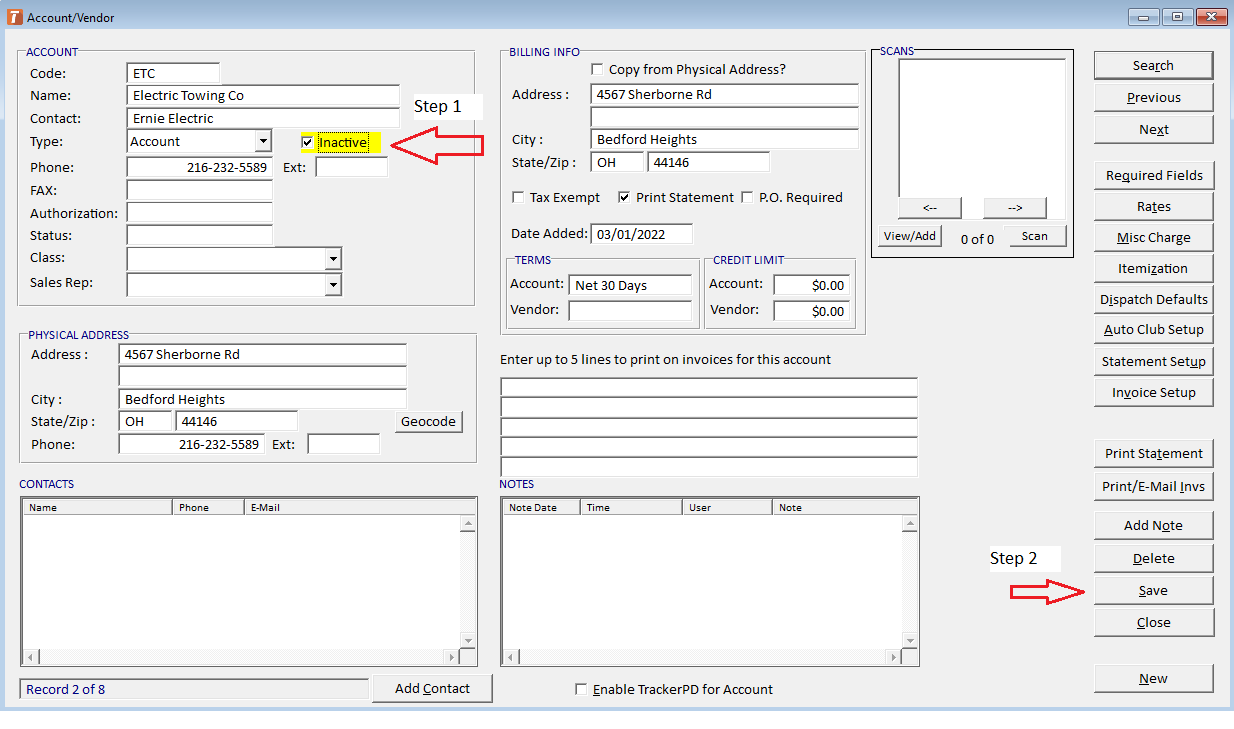
Then, as seen above, check the inactive box, right beside the account type drop down. Once this box is checked, and you click Save, the account will no longer be an option to assign tickets to, and it will no longer appear on account type reports.
Where do I see my Inactive Accounts?
You can view all of your inactive accounts by navigating to the Lists -> Account -> Account Vendor list, and checking the Inactive box at the top of the window as seen below.
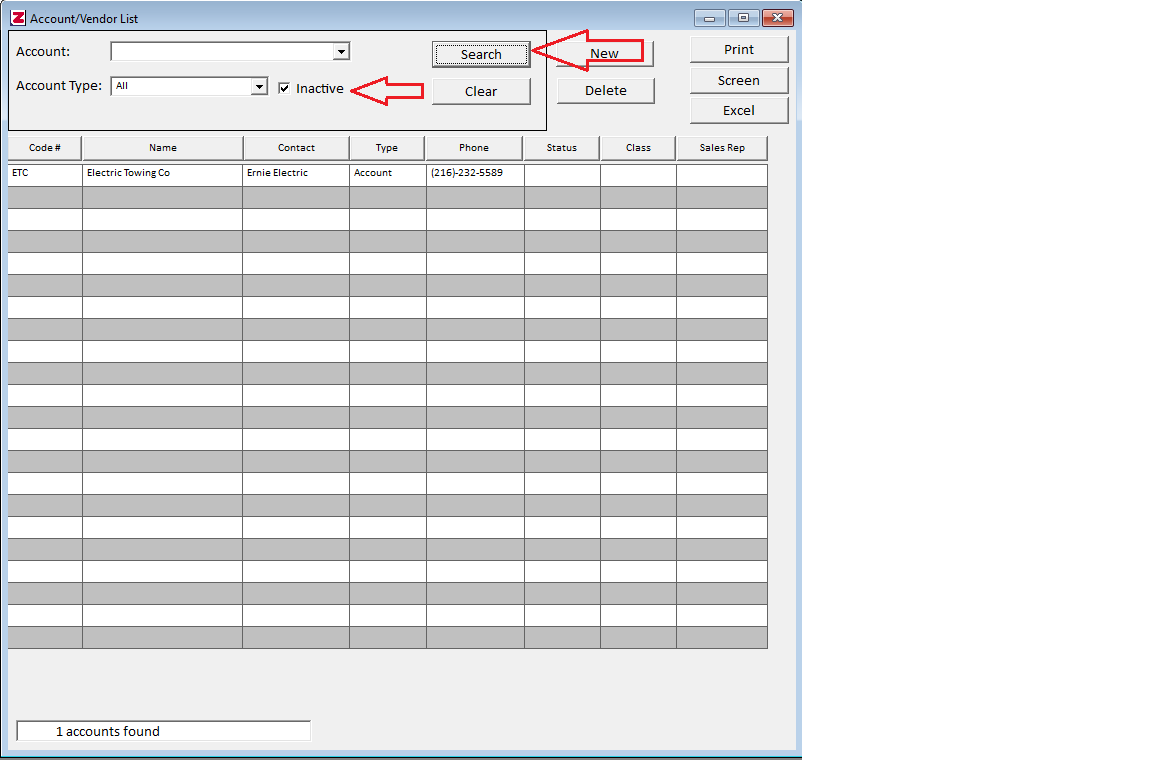
Once this box is checked click on the Search button. This will bring up all of your inactive accounts.
Making an Account Active
If you ever need to bring an account out of metaphorical retirement, then simply bring up your inactive account list, double click on the account you are looking for, remove the check from the inactive box and click save. This will bring the account to the active status once again.