One of the key features of Tracker is that it manages your employee data in an easily digestible format. Then, it applies your driver data to your invoices so you don't have to.
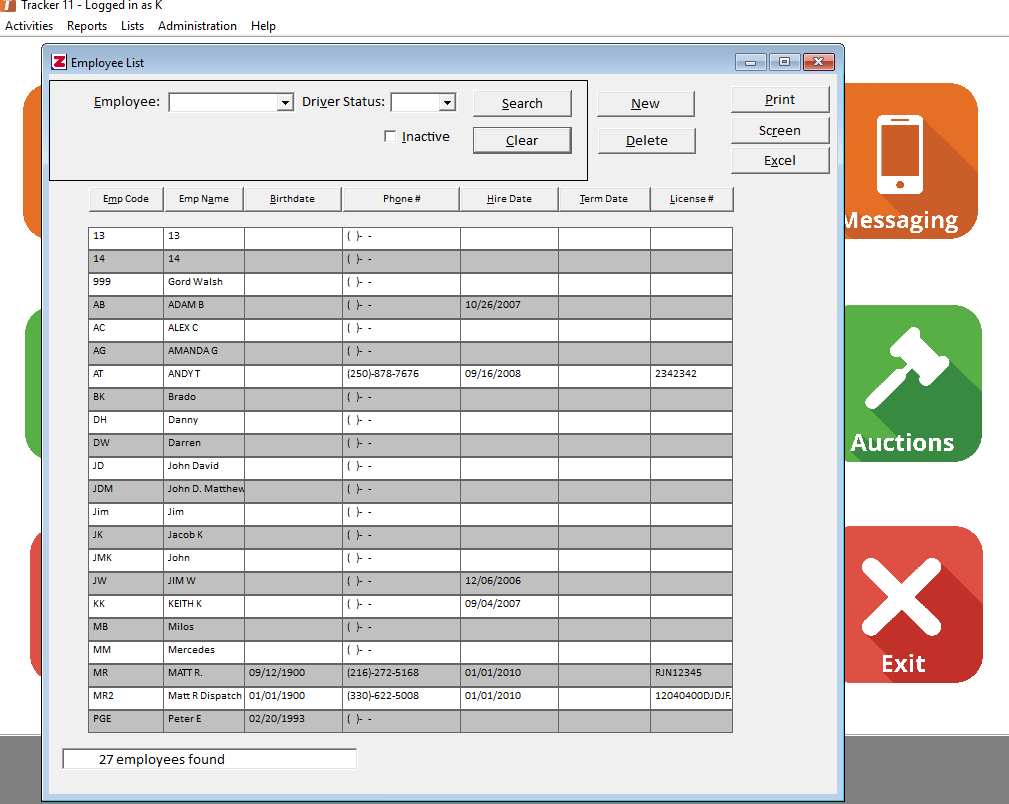
Setting up a new employee is very easy. From the main Tracker menu, navigate to Lists -> Employees -> Employees. This will bring up your employee list, as seen above. From here you can search for a particular employee, edit an employee's information by double-clicking on their name in the list, view inactive employees, print out a list of all of your employees, and, of course, add a new employee or driver.
The Employee Profile
The employee profile is how Tracker organizes its employee information for your company. Each of the data fields on this window are pretty self-explanatory, however, there are a few fields that are required and a few fields that we advise you to fill out.
The Employee Short Code, the Display Name, the First Name, the Last Name, and the Work/Cell Phone number. See the areas below in red.

Additional Fields if Adding a Driver (See Blue Sections Above)
The Driver box in the top right corner must be checked. This ensures that this employee shows up on the driver list when assigning a call.
The Mobile PW field, located in the emergency contact section, needs to have a short password in it. This will be the Driver's TrackerMobile password.
The Mobile PW field, located in the emergency contact section, needs to have a short password in it. This will be the Driver's TrackerMobile password.
The Messaging Setup filled out. See Below.
The Messaging Setup
In order for any of your drivers to receive call information as a text message, they need to have their messaging setup filled out properly. You can get to this from your employee's profile and select the Messaging Setup button on the right-hand side. The following window will appear.
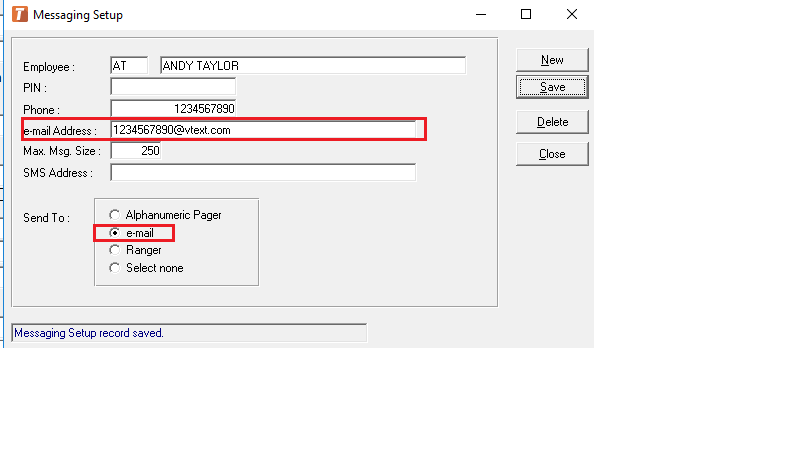
Filling this information out is very straightforward.
- Place the employee's short code in the first shorter field, then place their full name in the second field.
- Add the employee's phone number into the Phone field.
- Now, this is going to sound strange, but put your employee's mobile phone number, which they use to take calls, into the email address section. Then, follow this by their carrier gateway. (See item in red above).
- You can find a list of some common carrier gateways here, but googling the specific gateway usually yields results.
- All you have to do is find which carrier your driver has, and then place the appropriate gateway at the end of the number. So, for example, if your driver has Verizon, then you will put @vtext.com right at the end of the number.
- Place a minimum of 250 characters for the Max. Msg. Size or Maximum Message Size field. This determines how many characters can be on a message to a driver at a single time.
- Select the e-mail option for the Send To field. (See item in red above).
- Remember to click Save!
- Verify that your driver can receive calls and messages.